Setting up a Site
If you have admin rights to your Sitedrive account, you can start new sites. Simply click on the Sitedrive logo at the top left of the page to access the project view, where you can see all of your company's projects. At the top of the sites, there is a button labeled "New Site." Clicking on this button will open a window that will guide you through the process of creating a new site.
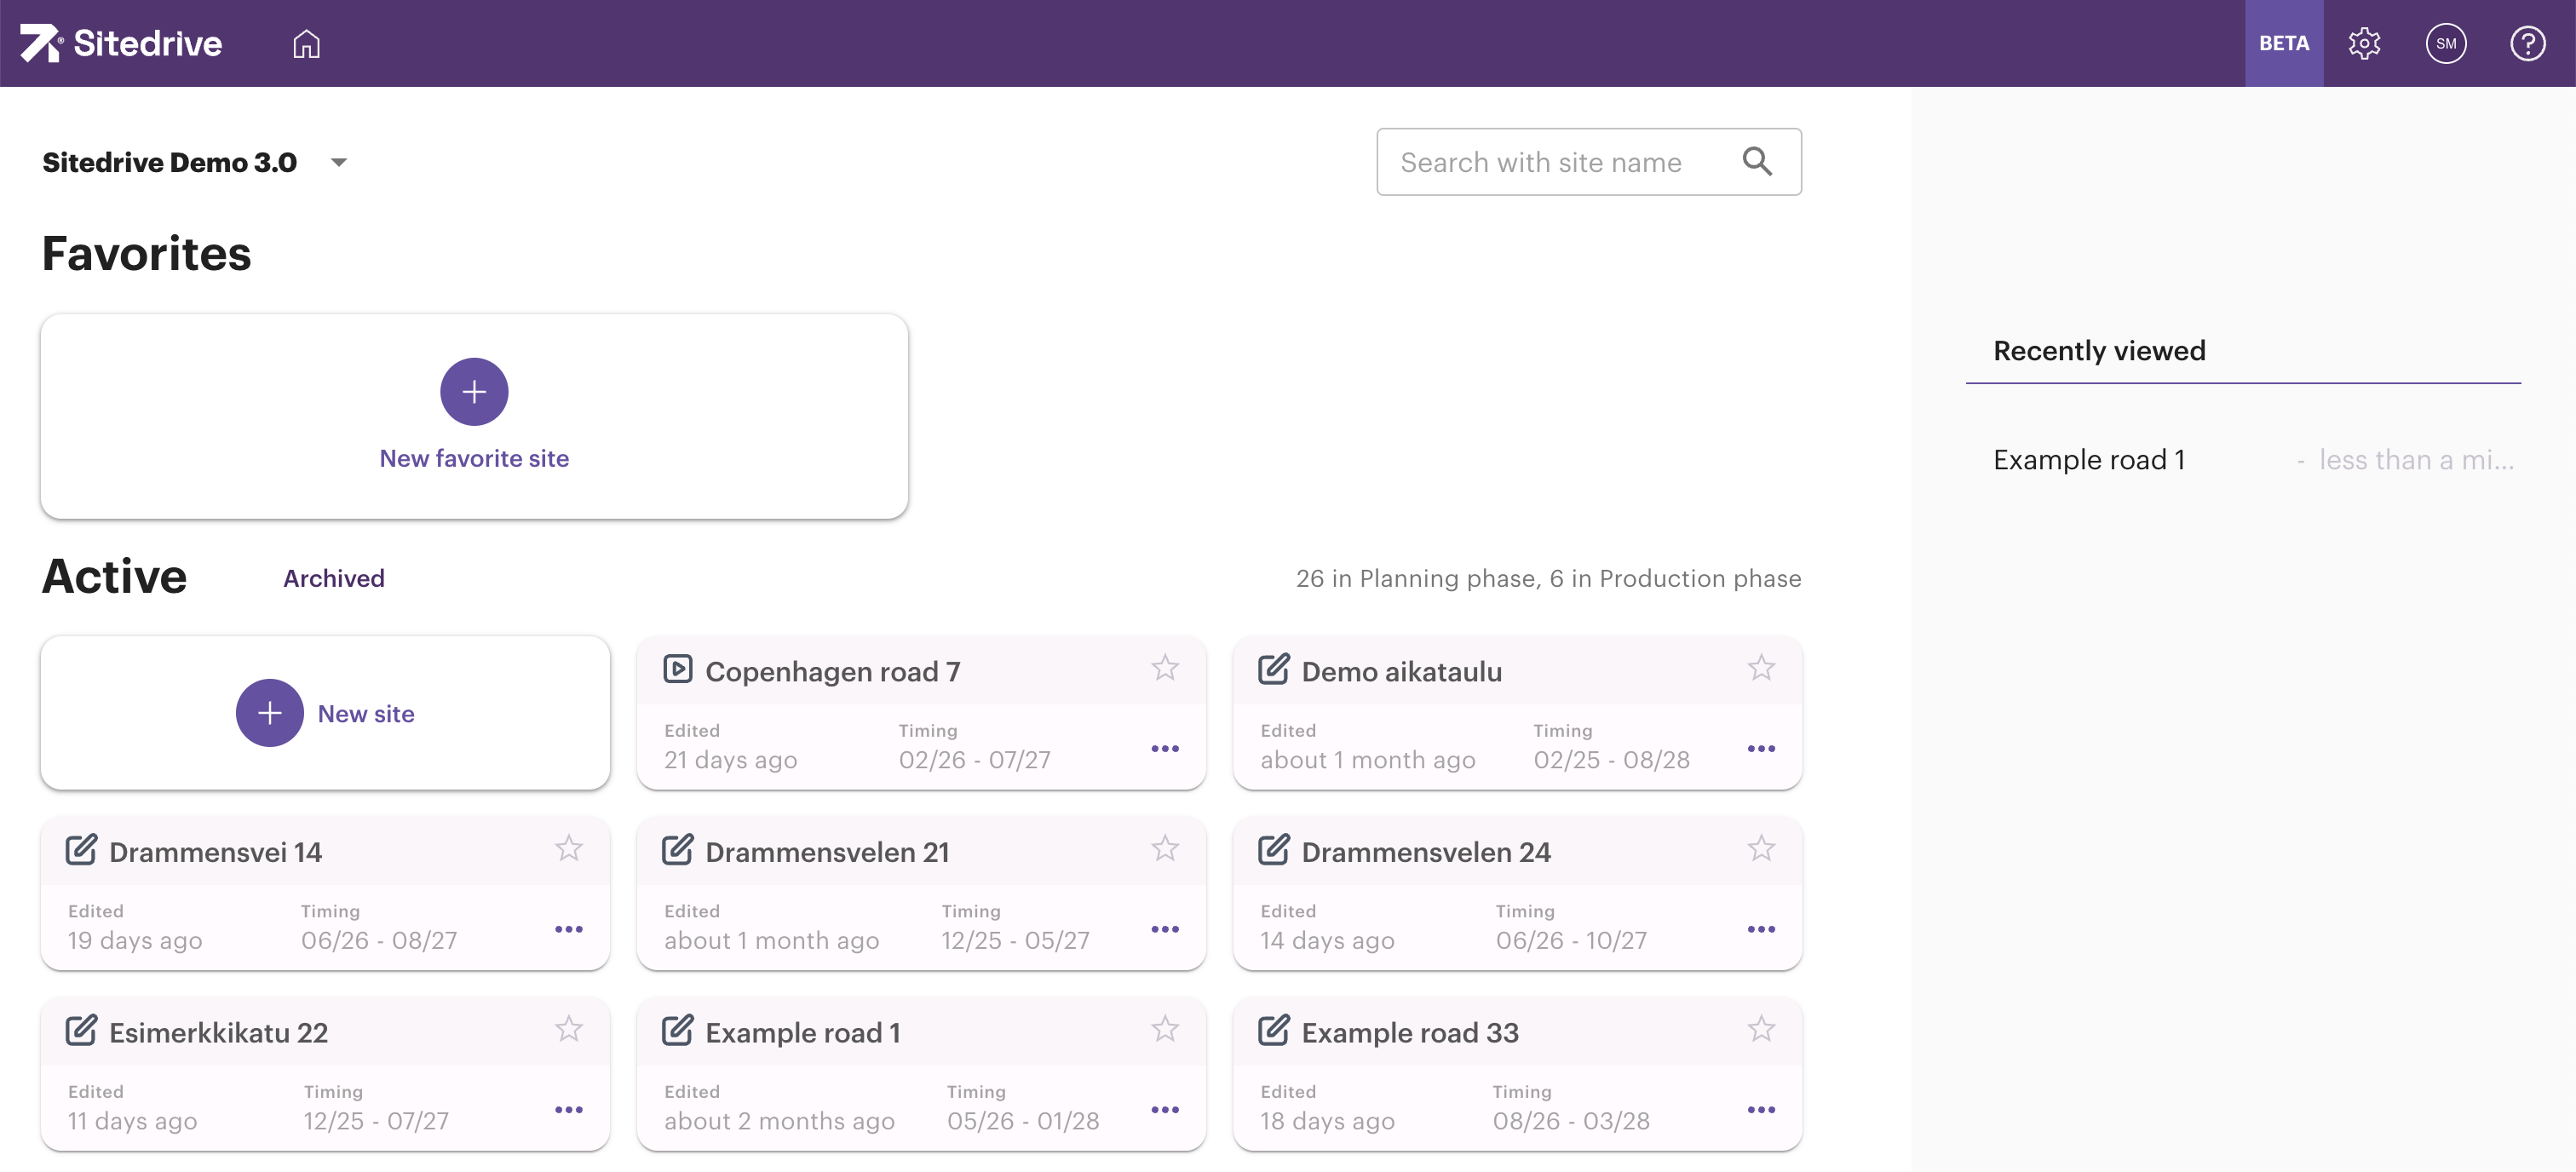
Simply add necessary details, only the name is required.

By clicking on the "Create" button, you have successfully created a new site. After saving, the control panel for your newly created site will be displayed.
New Schedule
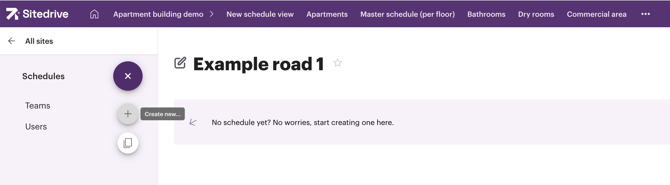
In Sitedrive, sites correspond to a construction project or high-level project, while schedules can manage various stages of a construction project such as design, production, and warranty phase.
- For more information on projects and schedules, you can find it here.
To create the schedule, hover over the + sign on the left side of the page. Click on the new + sign that appears to create a new schedule.
1. Add details for the schedule

Note: When creating a new schedule, you can either utilize a pre-made template linked to your company account or start scheduling the schedule from scratch.
For more information on templates, please visit: Schedule Templates and work package Library.
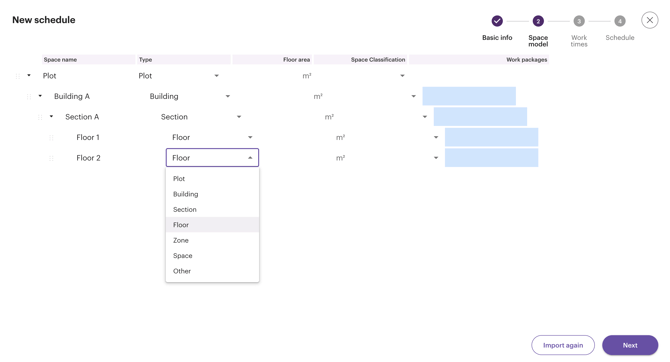
2. Create a Space Model
When creating a schedule, you have the option to create a space model for that schedule. You can do this in two ways: either by using a pre-existing excel template (refer to section 2.1) or starting from a blank template (refer to section 2.2). Depending on your project's progress, you can create a detailed space template or simply provide the address for the project site.
2.1 Excel template
Download the Excel template by clicking on the "Download Excel template" text. The Excel file contains a sample template for the building space model. Clear the rows of the downloaded space model, except for the header row, and create the project space model in the Excel spreadsheet program in the same way. After that, you can drag and drop the Excel file inside the dotted line.

2.2 Start with blank template
When starting from a blank template, you have the option to create a detailed space model for the entire project or simply provide the project site's address at the site level. We recommend creating a detailed space model early in the project to facilitate future planning.
3. Work times
Sitedrive automatically suggests standard construction work hours, 07:00-11:00 and 11:30-15:30. You have the option to adjust these as needed.
In the Work time exceptions section, you can add public holidays or vacations. Note that regional public holidays can be automatically added from the "Work time" menu after setup wizard is completed.
Timeline notes can be added to the project at this stage, although they are often determined during the overall schedule planning process.

4. Schedule
Create the first schedule view. Give it a name, for example, General Schedule. Choose a suitable area breakdown for the schedule. Sitedrive automatically creates four different location breakdown structures based on the inputted space model.

Read more about the space model and location breakdown structures here.
By clicking on "Finish," you will return to the first schedule. Clicking on the name of the schedule view you created will allow you to start planning the first schedule.
