
A site can have several schedules, for example a main schedule and a separate one for an early works package or a new building phase. Every schedule has its own space model, views and work, but it shares the site’s teams and users. Creating a site already gives you the first schedule, so you only need this when you want another one.
Before you start
- You need the Site role on the site (or be an Account admin). Users with only schedule-level roles don’t see the create option. See Roles and what each one can do.
Open the schedule menu
- Open any schedule on the site.
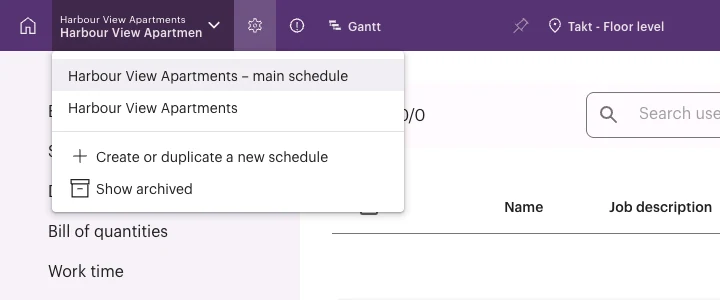
- Select the schedule selector at the top left. It shows ”
/ ”. - The menu lists the site’s schedules, then Create or duplicate a new schedule and Show archived.
Create a new schedule
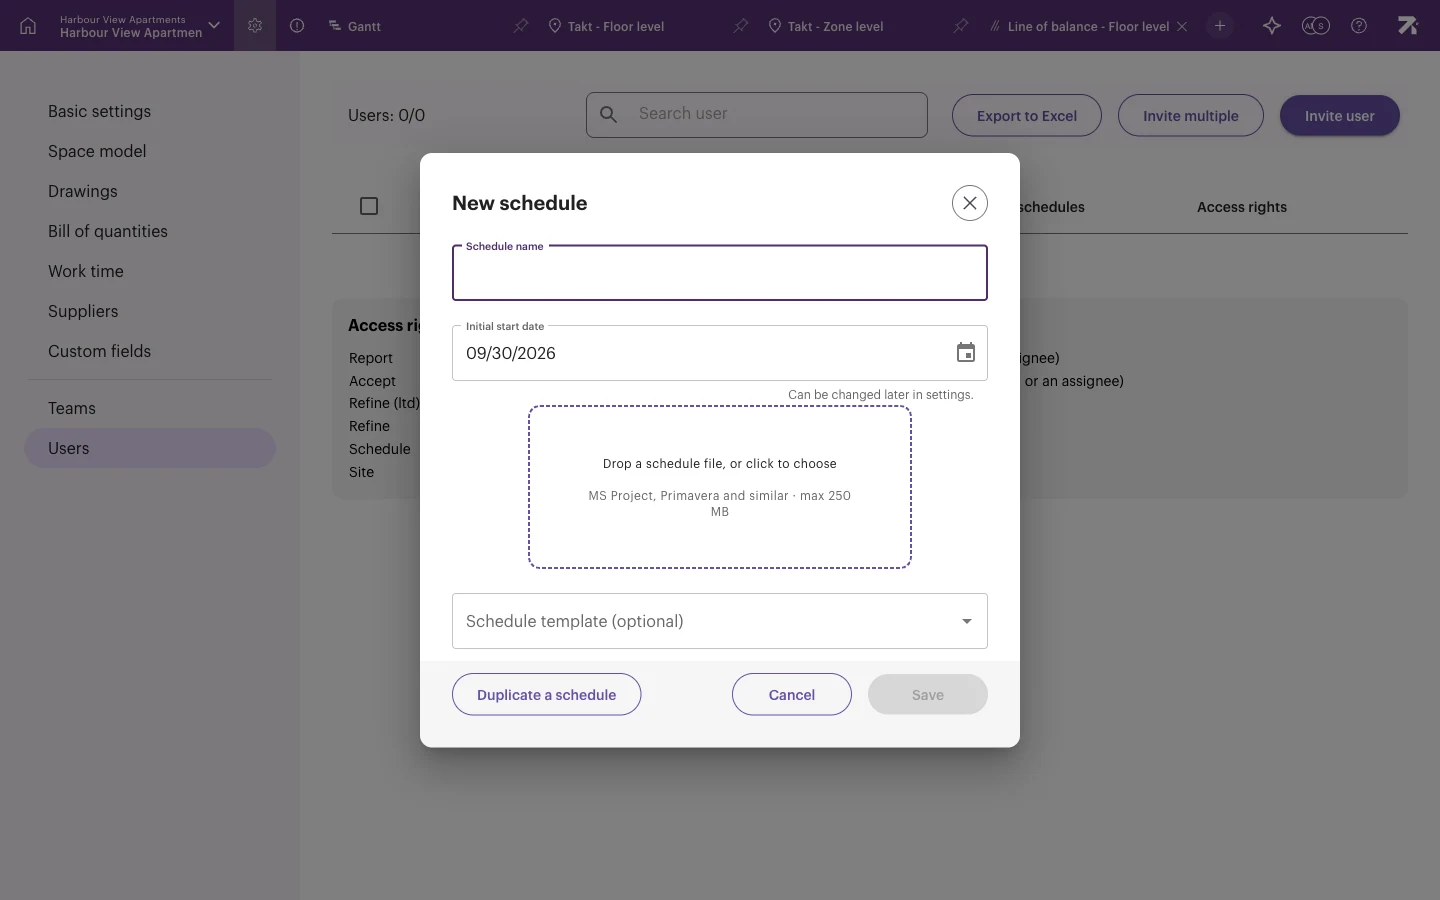
- In the schedule selector, select Create or duplicate a new schedule. The New schedule dialog opens.
- Type a Schedule name.
- Choose the Initial start date. It only sets up the initial calendar view; you can move work anywhere on the timeline afterwards.
- Optional: choose a Schedule template (optional) to start with a ready-made work package structure. Leave it empty for a blank schedule.
- Select Save.
Sitedrive opens the new schedule. A new schedule has no locations yet, so the Gantt’s Area column says “Sitedrive is best with locations. Add space model to start!”. Continue with Building the space model.
Create a schedule from a file
The New schedule dialog (and the Create site dialog) has a drop zone: Drop a schedule file, or click to choose — MS Project, Primavera and similar · max 250 MB.
- Drop your schedule file on the drop zone, or select it to choose a file.
- Check which column of the file Sitedrive uses for locations and which for teams. You can also choose not to set them and add them later in the app.
- Select Save.
The import runs in the background and you can’t edit the schedule until it finishes. If Sitedrive can’t work out the locations in your file, all work packages are placed in one location. You can then set up the locations yourself with the space model and Define areas.
Choosing a file clears the template, and choosing a template clears the file.
If an Account admin has switched on Allow LLM capabilities in Account settings → Settings, Sitedrive uses AI to help with the import, for example to infer the locations and teams from your file. See Account settings.
Duplicate a schedule
Duplicating copies an existing schedule’s space model and location breakdowns, and optionally its work.
- In the schedule selector, select Create or duplicate a new schedule.
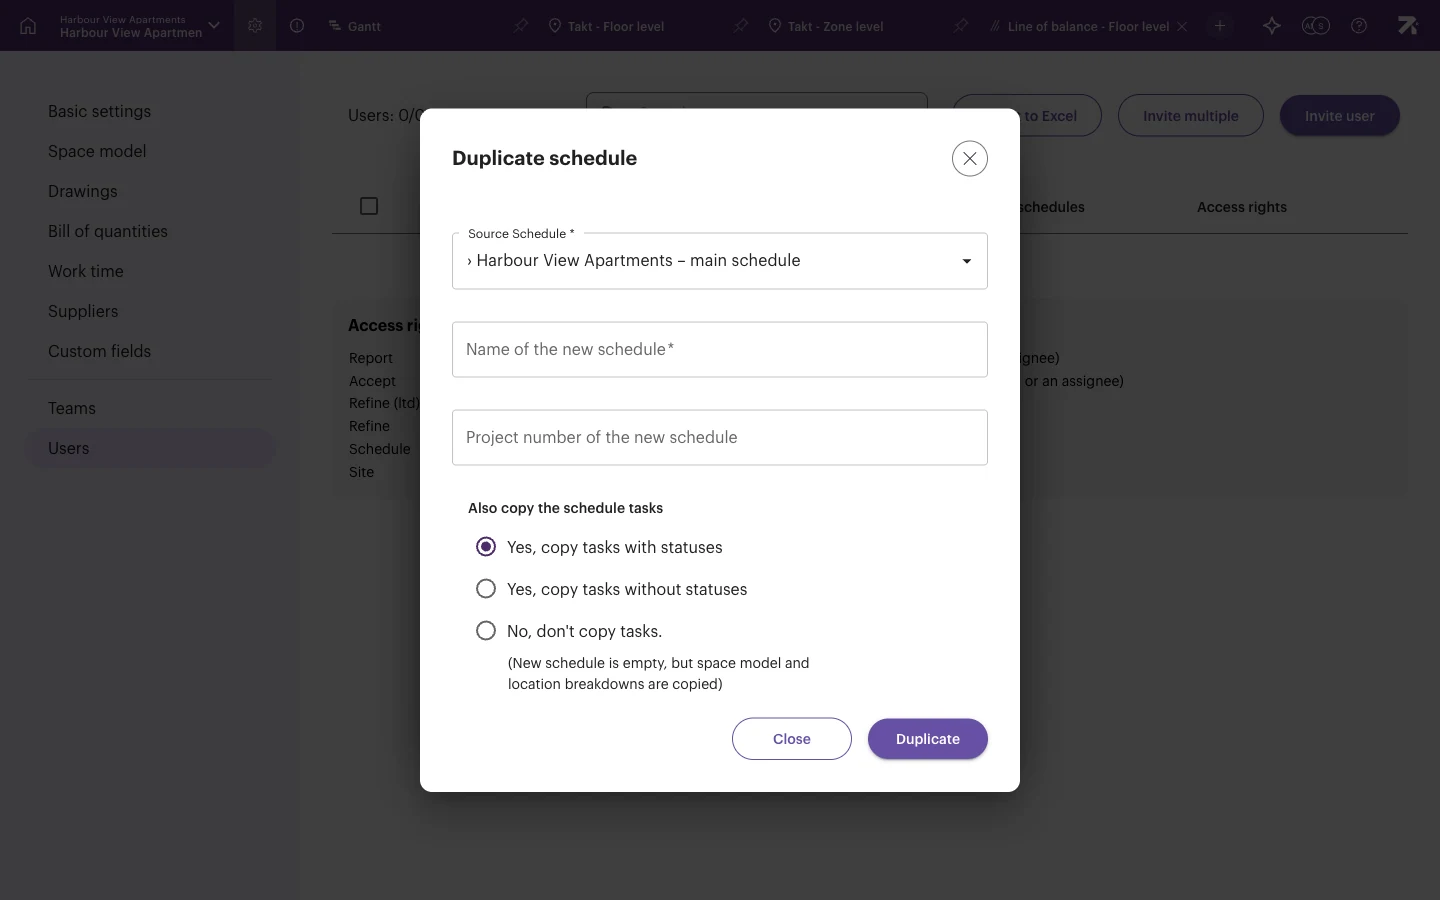
- Select Duplicate a schedule.
- Choose the Source Schedule.
- Type the Name of the new schedule and, if you use one, the Project number of the new schedule.
- Under Also copy the schedule tasks, choose one option:
- Yes, copy tasks with statuses – the copy keeps the progress already reported.
- Yes, copy tasks without statuses – the copy has the same work, all not started.
- No, don’t copy tasks. – the new schedule is empty, but the space model and location breakdowns are copied.
- Select Duplicate.
Good to know
- The Initial start date has no other purpose than creating a reasonable calendar. Work can be moved anywhere on the timeline after the schedule has been created.
- Statuses can’t be copied into a site that is in Planning phase. Move the site to Production phase first, or copy without statuses. See Creating a site.
- Teams and users belong to the site, so a new schedule on the same site already has them. You only choose which schedules each user can access. See Teams and people.
- To see schedules you have archived, select Show archived in the schedule selector.