
Define areas tells Sitedrive where work happens. You choose areas from a location breakdown, such as the floors of Staircase A and B, and Sitedrive creates one dated instance of each work package in each area. You also choose how the work is timed from area to area. This is what turns a list of work packages into a location-based plan.
Before you start
- You need a space model and a location breakdown.
- You need editing rights to the work packages: Schedule, Site or Account admin, or Refine/Refine (ltd) for work packages you own.
- Work packages should be grouped into phases. See Work packages.
Open Define areas
You can open it in several places:
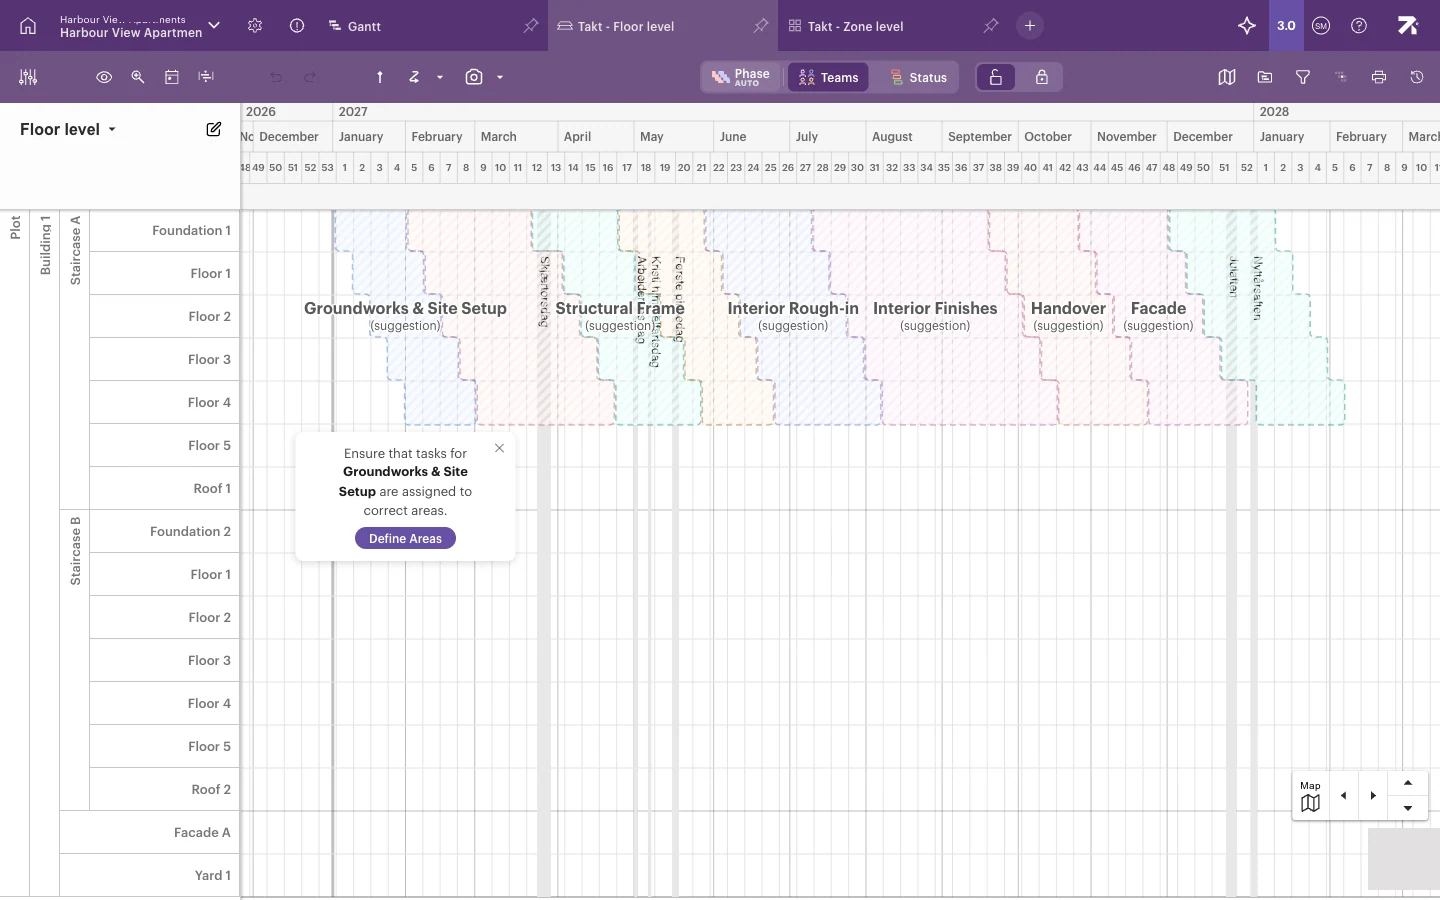
- Takt, first time: a phase with no areas is shown as a dashed “(suggestion)” and a card says “Ensure that tasks for phase name are assigned to correct areas.” Select Define Areas.
- Takt: right-click a phase or a selection and select Define Areas….
- Gantt: right-click a phase or work package row and select Define areas. On a sum row, it applies to all work packages under it.
Choose areas and timing
- In Work areas (where work happens), tick the areas. Ticking a parent, such as Staircase A, ticks everything under it.
- To find areas quickly, type in Search…, then select Select all matching. Your selection stays when you clear the search.
- Check the Location breakdown, for example Floor level.
- Under Scheduling, choose one of the four options (see the table below).
- Watch the schedule behind the drawer. It shows a live preview of the result and updates as you change areas or options.
- Select Save. Select Cancel to discard everything. Nothing changes until you save.
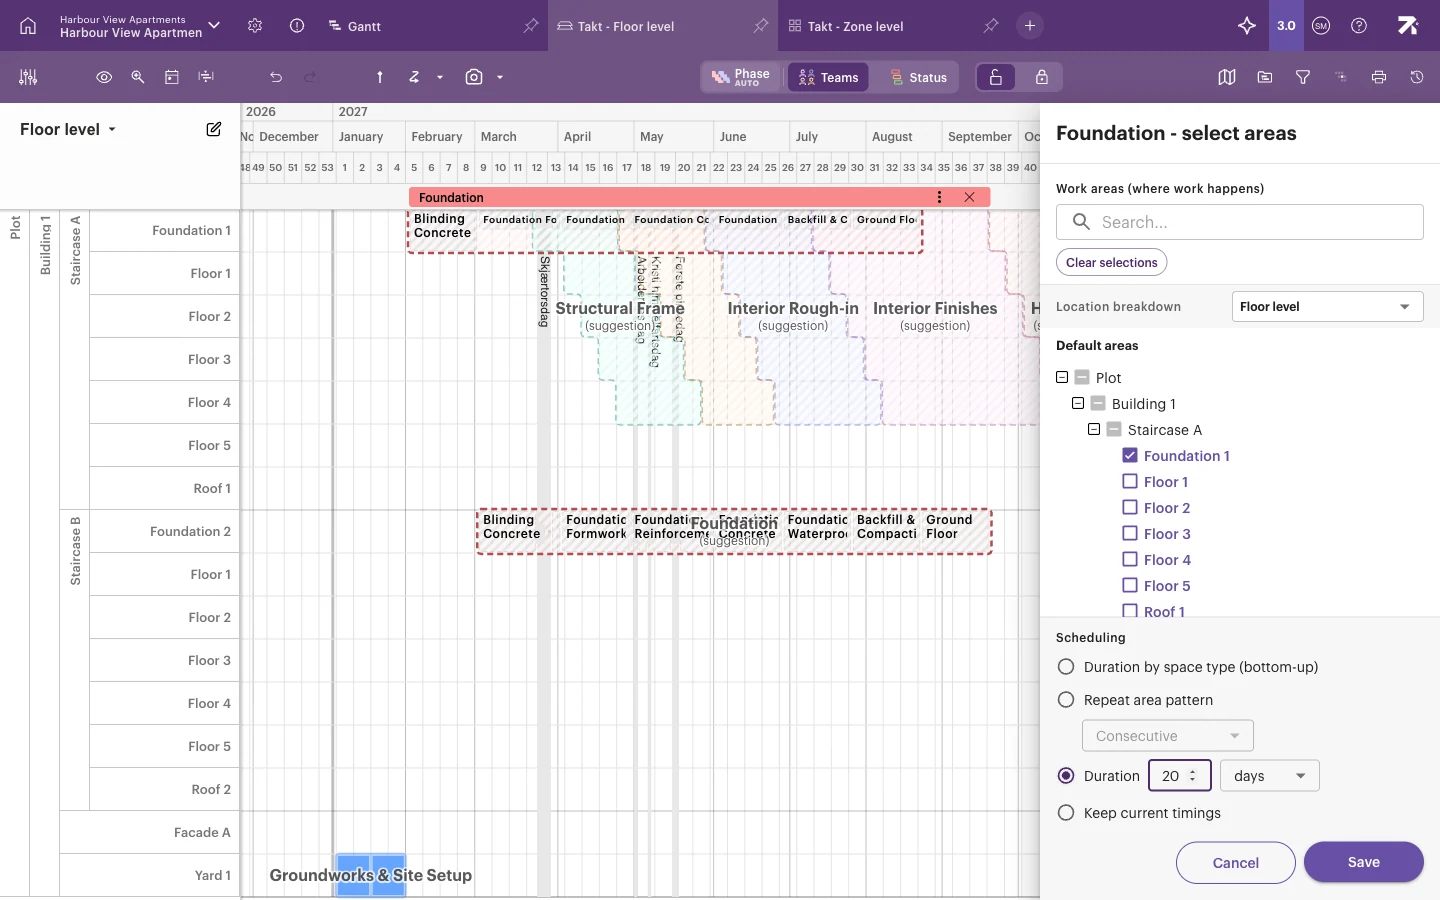 The drawer lists areas at the top and scheduling options at the bottom. The canvas shows the preview.
To start again, select Clear selections.
Tick the areas where the work happens, then choose a scheduling option. The preview updates as you go, and nothing is saved until you select Save.
The four scheduling options
| Option | What it does | Use it when |
|---|---|---|
| Duration by space type (bottom-up) | Gives each area a duration based on its space type (for example a floor gets 5 working days, a zone or space 1 day) and cascades the areas one after another. | You are placing a phase for the first time and want a quick starting point. |
| Repeat area pattern | Takes the timing pattern of the work already placed and repeats it in each area. Choose Consecutive (the next area starts when the previous one finishes) or Set start interval (each area starts a fixed number of days or hours after the previous one). | You have planned one floor carefully and want the others to follow the same rhythm. |
| Duration | Gives every area the same duration in days or hours and cascades them. | Every area takes about the same time. |
| Keep current timings | Leaves existing instances where they are. Newly added areas are placed after the last existing one. | You only want to add or remove an area without re-planning. |
Important: Only Keep current timings leaves existing timings alone. The other three options re-time all the selected work, even if you only added one area.
Add one area without changing dates
In Gantt, you can also edit the Area column directly. Select the cell, pick the areas and confirm. This always keeps current timings.
Good to know
- When you open the drawer, Sitedrive picks the option that matches the current timings, if it can recognise one.
- If you change the location breakdown inside the drawer, the option switches to Keep current timings. Existing dates are carried over to the new areas.
- If the pattern doesn’t fit before the end of the schedule calendar, you see a warning. Shorten the start interval.
- If the selected work packages use different area definitions, a warning says saving moves them all onto this one and keeps their dates.
- Some work packages may be excluded because their area definition is not compatible. The drawer tells you how many.
- With a single area, Duration by space type and Duration apply their own durations. Use Keep current timings to keep the work package’s current length.
- A phase that uses a different location breakdown can’t be edited in this view. Open a view that uses that breakdown.
- Work packages that have quantities open a separate quantity assignment dialog instead. See Quantity-based scheduling.
- You can undo a save with Ctrl/Cmd+Z.