
A location breakdown decides how finely your space model is divided into areas for planning. The same building can be planned floor by floor for the frame and apartment by apartment for the interior works. Each Takt and Line of balance view uses one location breakdown, and each piece of work is planned on one breakdown.
Before you start
- Location breakdowns come from the space model, so build it first. See Building the space model.
- Editing a breakdown needs the Schedule role. See Roles and what each one can do.
System location breakdowns
When you create the space model, Sitedrive creates these breakdowns automatically and keeps them up to date when the space model changes:
| Breakdown | One area per… | Example in Harbour View Apartments |
|---|---|---|
| Section level | section or staircase | Staircase A, Staircase B |
| Floor level | floor | Staircase A – Floor 3 |
| Zone level | zone, such as an apartment | Apt A7 |
| Smallest spaces | lowest-level space | every apartment, stairwell, roof and foundation |
At the same time two Takt views appear as tabs: Takt - Floor level and Takt - Zone level. A view’s tab name shows its view type and breakdown, for example “Line of balance - Floor level”.
System breakdowns can’t be deleted.
How work and breakdowns fit together
Each work package is planned on the breakdown of the view where you defined its areas. Frame work planned per floor lives on Floor level; interior work planned per apartment lives on Zone level.
Work planned on another breakdown is still shown, but faded, because it isn’t divided into the current view’s areas. For example, in Takt - Zone level the per-floor work appears faded, and its tooltip says “Incompatible location breakdown.” To edit that work in detail, open a view that uses its own breakdown. For a phase, Show in compatible view takes you there.
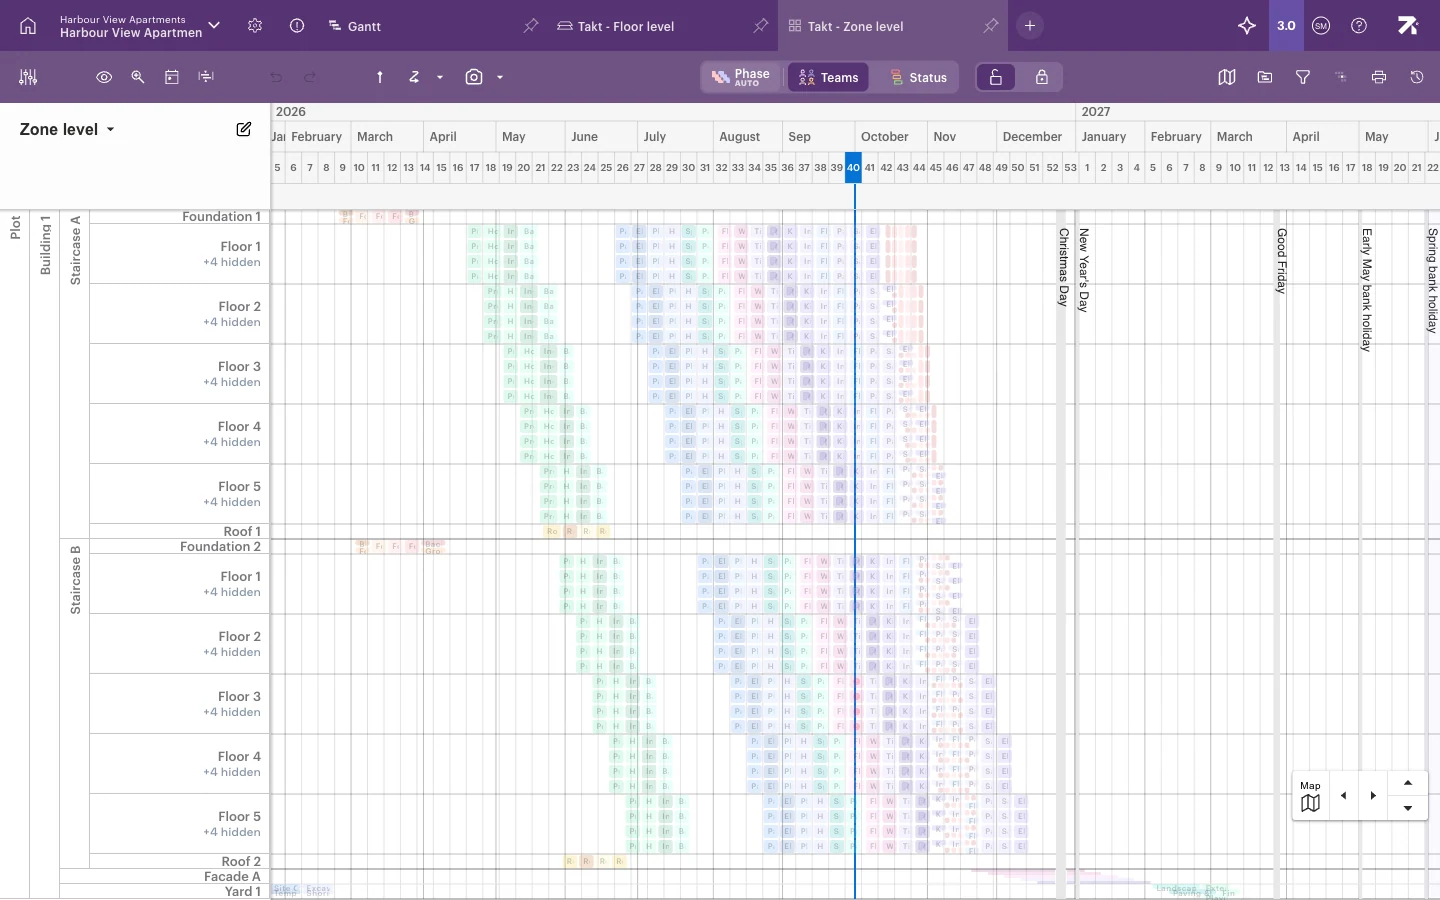
To move work onto another breakdown, use Define areas and pick another Location breakdown there.
Switch the breakdown a view uses
- Open a Takt or Line of balance view.
- At the top of the location column, select the breakdown name, for example Floor level ▾.
- Choose another breakdown from the list.
Only the current view changes. Other views keep their own breakdown.
Edit a breakdown in a view
You can change how spaces are grouped into areas directly in a view, for example to plan two small floors as one area.
- Open a view that uses the breakdown, for example Takt - Floor level.
- Select the pencil icon next to the breakdown name. The panel changes to Editing Floor level.
- Check the line under the title, for example “Shared — changes hit 9 phases and 1 view”. It tells you how many phases and views use this breakdown.
- Use Level to show fewer or more levels of detail.
- To combine areas, select the spaces and select Group. To split a group again, select it and select Ungroup.
- Select Save for all to apply the change everywhere the breakdown is used, or Cancel to discard it.
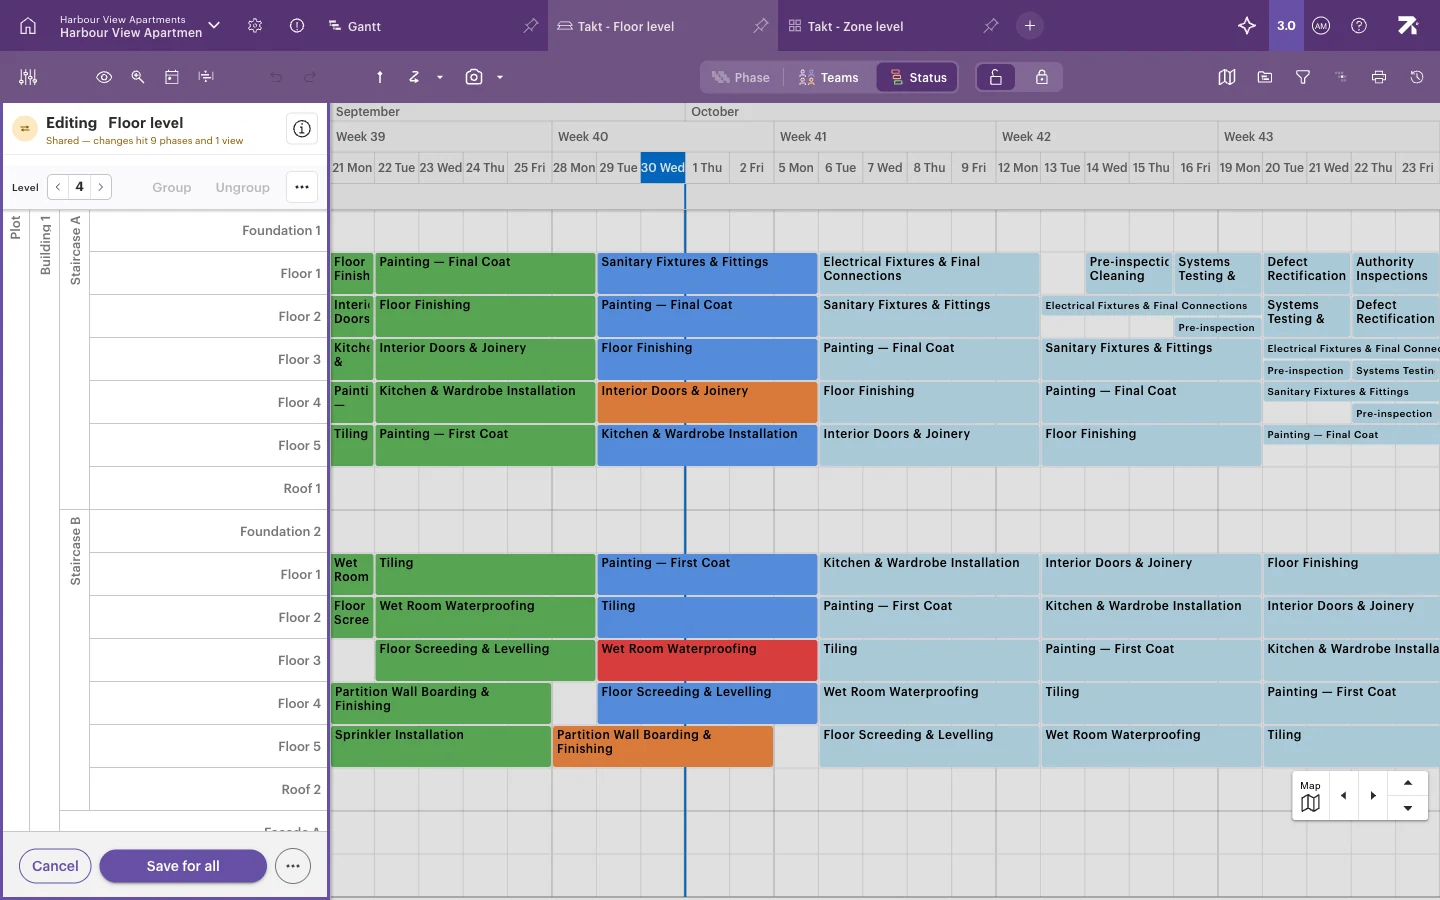
If you edit a system breakdown, your changes are saved as a new location breakdown. The system breakdown stays as it is, and the work connected to it moves to your new breakdown. Give it a name that describes what it shows.
The ⋯ button next to Save for all has Save as a new breakdown. Use it when only some phases or views should use your changes. You choose them in the dialog, and the original breakdown stays unchanged.
Select the pencil next to the breakdown name, select rows and choose Group. Cancel discards the changes.
Good to know
- Location breakdowns are shared within a schedule. Editing one affects every phase and view that uses it, not only the view you are in.
- Changes to the space model flow into the system breakdowns automatically.
- The Team swimlane view doesn’t use location breakdowns.